How to Protect Yourself from Uninsured and Under-insured Motorists
 This might be the scariest number you see today. According to the Insurance Research Council, ONE out of SEVEN drivers on the road in the United States has no insurance coverage at all. Others who might be carrying insurance are still allowed to carry limits so low that they wouldn’t come close to compensating you or your passengers should there be serious bodily physical harm.
For drivers who are legally insured, this is a truly frightening statistic. When you consider how expensive the fallout from a car accidents can be, taking into account everything: medical, property damage, vehicle damage, time lost from work, final expenses…etc, these costs quickly escalate into amounts even above average earners could never afford out-of-pocket.
What are the options available to protect yourself from uninsured or under insured drivers?
Keep reading, please.
The Problem With Insurance Requirements…
We need to confront reality before it confronts us. Let’s face it. There will always be drivers who will decide not to maintain insurance coverage at all. If you have an accident with one of these folks, and there is bodily injury, then Uninsured and Under insured motorist insurance is the best way to protect you and your passengers financial security. Even if you have excellent health insurance those kind of policies are not designed to compensate you for all that you may lose. While most states require proof of insurance in order to register a car, there are too many ways around this law for you to depend solely on THE LAW to protect you. You need to protect yourself. In order to do this, insurers offer optional limits for uninsured and under insured motorist coverage. Beyond being just a good idea, these optional higher limits should be part of your required auto insurance protection package.
What if you are involved in an accident with a driver who is legally covered but the amount of coverage they carry falls below the cost of the damages they cause? That’s a real problem, unless you’ve taken the proactive step of insuring yourself against Under-insuredmotorists. If you have not, the likely source for covering these additional costs may very well be YOU.
The Bottom Line
It’s unfortunate that we have so many people who choose not to take financial responsibility for their negligent actions on the roads. This is the sad reality of life today but that does not mean you have to go unprotected. You CAN and should protect yourself by making sure you have adequate Uninsured and Underinsured limits on your auto insurance policy. Discuss this very important coverage question with an experienced agent, like those at O’Connor & Co Insurance Agency. On-Line or on the phone we are always available for a one on one conversation.
Backyard safety concerns for your loved ones.
As the weather warms and children start to play outside, homeowners should consider the liability concerns surrounding backyard playground equipment. Seemingly harmless items such as swing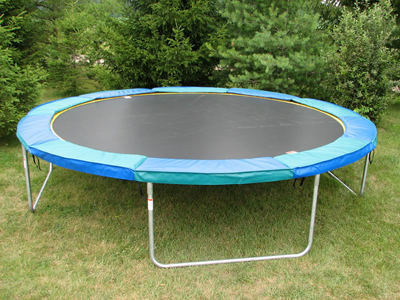 sets, slides, swimming pools, diving boards, trampolines or sandboxes can be a source of danger for small children and adults alike, and may open the homeowners to lawsuits and other legal action in the event of injury. Homeowners should seriously consider adding a $1,000,000 or higher Umbrella Liability Policy to their portfolio to increase protection against Liability claims if they have any of these items in their yards. This will minimize their out of pocket financial responsibility in the event of injury or death.
Slides are a major source of injuries in the backyard. Metal slides are particularly dangerous, as they can easily overheat in the sun and cause severe burns on small children, but plastic slides can still cause injuries. Children may fall over the side or attempt stunts on the slide. This type of equipment can be difficult to secure properly, which creates even more leeway for lawsuits. In especially hot weather, even plastic slides can heat up to unsafe temperatures and cause burns on small children.
Jungle gyms and play sets can also be put together incorrectly if assembled by an amateur, and caution should be used to prevent collapses. Play sets should always be placed on level ground, preferable with a soft, cushioned substrate surrounding the play area. Note that the substrate should always be placed after the play set has been secured and properly anchored to the ground. See manufacturer recommendations for information on anchoring and securing. Temperatures are a consideration for all play set equipment, regardless of the material it is made from. Metal bars get especially hot and can cause burns.
Before digging in your yard to install your playset or swimming pool, ensure you call your utility companies to have lines marked. Failure to do so can result in damage to electric, sewer, internet, cable, and other lines, and can come with heavy fines and extensive damage to structures. It is also advisable to visit your local city hall to determine if any variances are needed to construct play structures in your backyard. If you have a homeowner’s association, they’ll also need to be contacted, as some HOAs have strict rules regarding play structures in yards and require permission, or outright ban their construction. Taking these steps prior to initiating any construction can keep you from paying fees or having to demolish your play structure.
Trampolines are another dangerous backyard toy for small children. All trampolines should have safety netting, and weight limits should be strictly followed. Children should be properly instructed prior to jumping on the trampoline restrict the stunts or any dangerous jumping activities.
Swimming pools carry very specific dangers, regardless of their size. Ensure all pools are enclosed with a tall fence and a locked gate, or are drained or covered nightly with any ladders or equipment stored separately. Individuals who cannot swim should never be near pools without supervision, and home owners should thoroughly check with their homeowners agent or their insurance policy itself to ensure their pool and any liability connected in injury or death is covered adequately. Care should be taken to restrict access to your pool to unauthorized users, as inebriated individuals are among the most likely to fall prey to an injury or fatal accident as a result of access to an unsupervised pool.
All equipment should be inspected frequently for loosened joints, failure of structural integrity, splinters, and other damage resulting from use or weather. Prevention is the best way to ensure injuries are kept to a minimum. In addition to inspection, children should be trained to report any damage they notice or cause while playing to an adult immediately. Equipment should be repainted frequently to reduce damage, wear, and the possibility of splinters. If possible, look to replace wooden structures with plastic, especially in humid areas or places with large wood eating insect populations.
If cooking or burning fires in your backyard, always remove dry debris from the area before lighting the fire. Check that your fire will have adequate ventilation and is not against flammable materials. Use a screen or other means to keep small children and pets away from the fire, as they may not understand verbal warnings about the heat from fires. Always be aware of grease, and have a fire extinguisher available to put out unexpected sparks or fires. Check to ensure your fire extinguisher is properly rated for the type of fire you will be dealing with- grease fires must be put out with a different type of extinguisher than those burning wood or paper.
Homeowners insurance generally comes with some liability coverage for individuals visiting the home, but this coverage may or may not be adequate to protect your assets in the event of a lawsuit or claim. Clients can visit their Massachusetts insurance agent for information on how to document valuables, determine net worth, and calculate how much insurance coverage is needed to limit liability.
Umbrella policies are a great option for those seeking a additional layers of liability protection, especially since homeowners policies are limited on what they will or will not cover.
Massachusetts law requiring headlights and tail lights to be on when raining or foggy
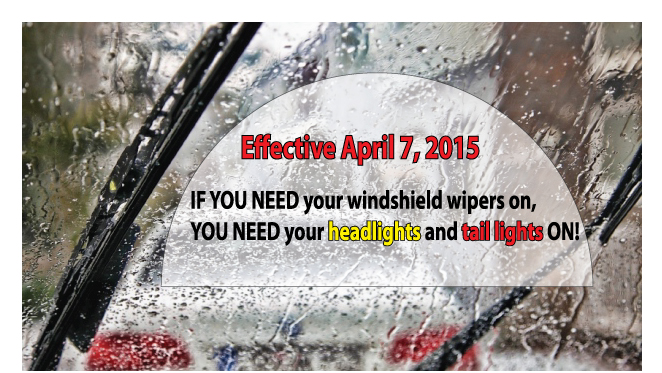
Effective April 7, 2015, a new MA law requires that you turn on your headlights and tail lights whenever you turn on your windshield wipers. The new law also requires YOU to use your headlights and tail lights when visibility is less than 500 feet. Failure to follow the new law could result in a ticket AND and insurance surcharge. So, please remember to Let Your Lights Shine….when it’s rainy or foggy.
How to prevent frozen pipes and how to thaw them.
Pipes that freeze most frequently are those that are exposed to severe cold, like those in unheated interior areas like basements and crawl spaces, attics, garages or kitchen cabinets. 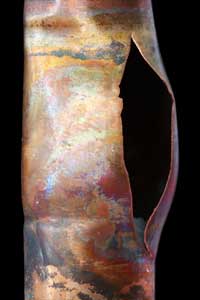 With bitterly cold arctic air and wind chills remaining below freezing, parts of the country are seeing some of its coldest weather in about 20 years, according to the National Weather Service. In these single digit temperatures, one concern for homeowners is frozen water pipes in unheated basements and crawl spaces of local homes. The American Red Cross suggests tips on how to prevent freezing and what to do if pipes do freeze. Why Pipe Freezing is a Problem Water has a unique property in that it expands as it freezes. This expansion puts tremendous pressure on whatever is containing it, including metal or plastic pipes. No matter the “strength” of a container, expanding water can cause pipes to break. Pipes that freeze most frequently are those that are exposed to severe cold, like outdoor hose bibs, swimming pool supply lines, water sprinkler lines, and water supply pipes in unheated interior areas like basements and crawl spaces, attics, garages, or kitchen cabinets. Pipes that run against exterior walls that have little or no insulation are also subject to freezing. Preventing Frozen Pipes Before the onset of cold weather, prevent freezing of these water supply lines and pipes by following these recommendations:
- Drain water from swimming pool and water sprinkler supply lines following manufacturer’s or installer’s directions. Do not put antifreeze in these lines unless directed. Antifreeze is environmentally harmful, and is dangerous to humans, pets, wildlife, and landscaping.
- Remove, drain, and store hoses used outdoors. Close inside valves supplying outdoor hose bibs. Open the outside hose bibs to allow water to drain. Keep the outside valve open so that any water remaining in the pipe can expand without causing the pipe to break.
- Check around the home for other areas where water supply lines are located in unheated areas. Look in the basement, crawl space, attic, garage, and under kitchen and bathroom cabinets. Both hot and cold water pipes in these areas should be insulated.
- Consider installing specific products made to insulate water pipes like a “pipe sleeve” or installing UL-listed “heat tape,” “heat cable,” or similar materials on exposed water pipes. Newspaper can provide some degree of insulation and protection to exposed pipes – even ¼” of newspaper can provide significant protection in areas that usually do not have frequent or prolonged temperatures below freezing.
During Cold Weather, Take Preventative Action
- Keep garage doors closed if there are water supply lines in the garage.
- Open kitchen and bathroom cabinet doors to allow warmer air to circulate around the plumbing. Be sure to move any harmful cleaners and household chemicals up out of the reach of children.
- When the weather is very cold outside, let the cold water drip from the faucet served by exposed pipes. Running water through the pipe – even at a trickle – helps prevent pipes from freezing.
- Keep the thermostat set to the same temperature both during the day and at night. By temporarily suspending the use of lower nighttime temperatures, you may incur a higher heating bill, but you can prevent a much more costly repair job if pipes freeze and burst.
- If you will be going away during cold weather, leave the heat on in your home, set to a temperature no lower than 65° F.
To Thaw Frozen Pipes
- If you turn on a faucet and only a trickle comes out, suspect a frozen pipe. Likely places for frozen pipes include against exterior walls or where your water service enters your home through the foundation.
- Keep the faucet open. As you treat the frozen pipe and the frozen area begins to melt, water will begin to flow through the frozen area. Running water through the pipe will help melt ice in the pipe. You can check for leaks in the pipe at this point. They do make an epoxy tape just for that needed temperature. This is emergency fix only.
- Apply heat to the section of pipe using an electric heating pad wrapped around the pipe, an electric hair dryer, a portable space heater (kept away from flammable materials), or by wrapping pipes with towels soaked in hot water. Do not use a blowtorch, kerosene or propane heater, charcoal stove, or other open flame device.
- Apply heat until full water pressure is restored. If you are unable to locate the frozen area, if the frozen area is not accessible, or if you can not thaw the pipe, call a licensed plumber.
- Also, adding a room temp device into a crawl space or known cold spot can alert you to a possible situation before they become critical. When connected to an alarm system, it can be monitored ahead of time and can prevent a broken pipe to begin with, and saving you time and money.
Check all other faucets in your home to find out if you have additional frozen pipes. If one pipe freezes, others may freeze, too.
What NOT to share on social media websites if you are planning a vacation.
You have been planning this vacation for what seems like forever, and now the time finally comes where you can leave everything behind….. work and personal responsibility will be a distant memory for at least few days……RIGHT??? You have so many things to do, such as pack your belongings, pay the bills and, most important of all, spread the news of your vacation to all your friends on your social network….. RIGHT???? Well WRONG. Better think twice about that last item. If fact, if you are smart scratch that all together. Before you tell everyone on Facebook, Twitter and other sites of your planned time away from home, consider everyone else who might read your posts.
According to a story in a local Daily Newspaper, two men broke into an elderly woman’s home after her granddaughter had posted information, including pictures of casino winnings on Facebook. Luckily, the men left without harming the woman, but it makes the point that you simply cannot put personal information like this on a social network. Even if you set your status updates to private, almost anyone can access your information once you post it online.
If you still don’t believe it, visit PleaseRobMe.com. to drive home this point a little more. We all want to share the excitement of special occasions with our friends but do it over the phone or better yet….wait untill you get back. Another thing, don’t tell everyone with a message on your answering machine or a voice mail either. Sharing pictures of your vacation on Instagram can wait until you make it safely back home. If you value your home and property, understand the dangers of posting your personal information online. In the “old” days, we had to tell our children not to talk to strangers. Now, we have to add the part about not sharing vacation plans on social media either.
If you have 1,000 friends on Facebook or hundreds of Twitter followers, consider how closely you know each of those people. Only tell your closest friends, family members and neighbors of your planned absence away from home. If you accidentally leak your vacation plans online, update your status and comment so that it looks as though you have made it back home. It’s also a great idea to have a home security system and, of course, homeowner’s insurance that is paid in full.
Extremely powerful video about seat belt safety.
This is the new “wear your seat belt” ad the UK is doing – started by some dude not hired to do it, but because the cause is important to him, he came up with this idea, and now it’s being hailed across the world as a “beautiful” commercial.
Some of the worst places for speeding tickets in New England
Police in some states frequently write speeding tickets and make it as hard as possible for motorists to avoid them. They also impose particularly large penalties. This is true of several states in New England; relatively low crime rates allow police to spend many hours catching speeders. They often target drivers from other states, so it’s crucial to avoid speeding if you visit this region.
Although Massachusetts may not have the largest fines, the state’s court system makes it very difficult to appeal them. The filing fees required to contest a ticket often surpass the cost of accepting the fine, according to Yahoo Autos. Forbes reports that the minimum penalty in Massachusetts is only $50. However, exceeding the speed limit by 25 mph will cost you an extra $150.
Connecticut is known for using numerous unmarked cars. Most of the state police vehicles have few or no markings. This makes it difficult to identify them without a radar detector. Police in Connecticut often drive unmarked Ford and Chevy sports cars as well. Truck drivers try to warn each other about these vehicles; they are known as “plain wrappers” in CB lingo.
Local police regularly operate clever “speed traps” in the small towns of Vermont. These villages don’t have many businesses or residents to generate tax revenue, so they make up for it by writing plenty of tickets. Wilmington and Island Pond are two of the state’s major speed trap zones. Motorists in rural Vermont must remain vigilant by watching for unmarked cars and sudden changes in the speed limit.
New Hampshire demands unusually high speeding fines. If you speed in the Granite State, AOL indicates that you may face a penalty of up to $1,000 on your first offense. Drivers should use extra caution in southern New Hampshire; Nashua and Manchester are known for their speed traps. On the bright side, the National Motorists Association reports that tickets remain relatively rare in the neighboring state of Maine.
Keep in mind that you can be ticketed for driving too fast in icy or snowy weather, even when you have not exceeded the limit. Tell the truth and behave politely if the police stop you. If you are lucky, the officer might only give you a warning. Consider appealing a ticket if you feel that it was issued unfairly. A successful appeal will cancel the fine and prevent your auto insurance premiums from increasing. That’s right, the other downside of a speeding ticket is the effect it has on your insurance rates. Even a first time ticket can affect rates so make sure you observe speed limits and avoid this needless, costly experience.
Tornado – Disaster Preparation Kit
FEMA Disaster Kit
A disaster supplies kit is simply a collection of basic items your household may need in the event of an emergency.
Try to assemble your kit well in advance of an emergency. You may have to evacuate at a moment’s notice and take essentials with you. You will probably not have time to search for the supplies you need or shop for them.
You may need to survive on your own after an emergency. This means having your own food, water and other supplies in sufficient quantity to last for at least 72 hours. Local officials and relief workers will be on the scene after a disaster but they cannot reach everyone immediately. You could get help in hours or it might take days.
Additionally, basic services such as electricity, gas, water, sewage treatment and telephones may be cut off for days or even a week, or longer. Your supplies kit should contain items to help you manage during these outages
Family Supply List
Emergency Supplies:
Water, food, and clean air are important things to have if an emergency happens. Each family or individual’s kit should be customized to meet specific needs, such as medications and infant formula. It should also be customized to include important family documents.
Recommended Supplies to Include in a Basic Kit:
– Water, one gallon of water per person per day, for drinking and sanitation
– Food, at least a three-day supply of non-perishable food
– Battery-powered radio and a NOAA Weather Radio with tone alert, and extra batteries for both
– Flashlight and extra batteries
– First Aid kit
– Whistle to signal for help
– Infant formula and diapers, if you have an infant
– Moist towelettes, garbage bags and plastic ties for personal sanitation
– Dust mask or cotton t-shirt, to help filter the air
– Plastic sheeting and duct tape to shelter-in-place
– Wrench or pliers to turn off utilities
– Can opener for food (if kit contains canned food)
Clothing and Bedding:
If you live in a cold weather climate, you must think about warmth. It is possible that the power will be out and you will not have heat. Rethink your clothing and bedding supplies to account for growing children and other family changes. One complete change of warm clothing and shoes per person, including:
– A jacket or coat
– Long pants
– A long sleeve shirt
– Sturdy shoes
– A hat and gloves
– A sleeping bag or warm blanket for each person
Other items
Below are some other items for your family to consider adding to its supply kit. Some of these items, especially those marked with a * can be dangerous, so please have an adult collect these supplies.
– Emergency reference materials such as a first aid book or a print out of the information on www.ready.gov
– Rain gear
– Mess kits, paper cups, plates and plastic utensils
– Cash or traveler’s checks, change
– Paper towels
– Fire Extinguisher
– Tent
– Compass
– Matches in a waterproof container*
– Signal flare*
– Paper, pencil
– Personal hygiene items including feminine supplies
– Disinfectant*
– Household chlorine bleach* – You can use bleach as a disinfectant (diluted nine parts water to one part bleach), or in an emergency you can also use it to treat water. Use 16 drops of regular household liquid bleach per gallon of water. Do not use scented, color safe or bleaches with added cleaners.
– Medicine dropper
– Important Family Documents such as copies of insurance policies, identification and bank account records in a waterproof, portable container
How to be properly prepare during the hurricane season.
June 1 marks the official start of the 2016 Atlantic hurricane season.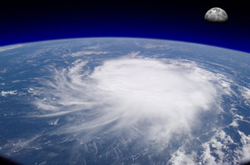 The National Oceanic and Atmospheric Administration is predicting an “active or extremely active” season this year.
NOAA says there are likely to be 13 to 20 named storms this year “of which 7 to 11 could become hurricanes … including 3 to 6 major hurricanes.” Climate Central notes that NOAA doesn’t predict how many storms will actually make landfall, but “some factors suggest that the U.S. will run a higher risk of landfalling tropical storms and hurricanes this year than in 2012.”
Here is a list that can help you be prepared.
- Water – at least 1 gallon daily per person for 3 to 7 days
- Food – at least enough for 3 to 7 days
- non-perishable packaged or canned food / juices
- foods for infants or the elderly
- snack foods
- non-electric can opener
- cooking tools / fuel
- paper plates / plastic utensils
- Blankets / Pillows, etc.
- Clothing – seasonal / rain gear/ sturdy shoes
- First Aid Kit / Medicines / Prescription Drugs
- Special Items – for babies and the elderly
- Toiletries / Hygiene items / Moisture wipes
- Flashlight / Batteries
- Radio – Battery operated and NOAA weather radio
- Telephones – Fully charged cell phone with extra battery and a traditional (not cordless) telephone set
- Cash (with some small bills) and Credit Cards – Banks and ATMs may not be available for extended periods
- Keys
- Toys, Books and Games
- Important documents – in a waterproof container or watertight resealable plastic bag
- insurance, medical records, bank account numbers, Social Security card, etc.
- Tools – keep a set with you during the storm
- Vehicle fuel tanks filled
- Pet care items
- proper identification / immunization records / medications
- ample supply of food and water
- a carrier or cage
- muzzle and leash
Snow accumulation on roofs and the dangers it presents.
This message is a reminder from the Department of Public Safety and the Department of Fire Services.
The February 8th winter storm that hit Massachusetts presents a variety of challenges. As we approach the new week, it is anticipated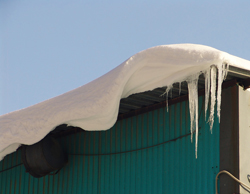 that warm temperatures and rainfall may blanket portions of Massachusetts . With the recent heavy snowfall, rain will increase the weight of snow on roofs throughout the Commonwealth. Fire and building services need to plan for the onset of storm related issues.
Flat roofs, lower roofs that meet higher roofs, and areas with parapets or areas of drifting snow are major concerns. Many commercial building owners may hire or bring staff on to clear snow from flat roofs to help ease the burden of additional weight. In doing so, they will also make it easier for fire services to access and traverse these areas in the event of an emergency. In areas of significant snowfall consideration should be given to the additional weight firefighters may contribute on these roofs.
Homeowners, tenants, and businesses should be cognizant of the dangers posed by heavy snow loads on roofs, and the warning signs of potential structural weaknesses. In most instances, risks posed by accumulated snow on roofs may be mitigated by safely removing the snow. from roofs of both commercial buildings and homes. As temperatures are expected to rise and fall over the next several days, every effort should be undertaken now to safely remove snow from roofs.
Removing snow from rooftops will minimize the likelihood of structural collapse. Flat and low pitched roofs, most often found on industrial buildings, but are also used in certain home designs, are at the greatest risk of buckling under heavy snow and ice accumulations. Lower roofs, where snow drifts or accumulates from higher roofs are also vulnerable.
Did you know that a cubic foot of dry snow weighs about seven pounds? While a cubic foot of wet snow may weigh up to 20 pounds. So, if at all possible, consider hiring someone to help with all of the snow clearing.
Here are some helful tips for a Homeowner in the removal of snow and ice from roofs and other areas.
Wear protective headgear and goggles when performing any of these tasks.
Use a snow rake for pitched roofs (available at most hardware stores) to remove snow from your roof.
Start from the edge and work your way into the roof.
Keep gutters, and drains clean, free of ice and snow and keep downspouts clean at ground level.
Try to shave the snow down to a 2 or 3 inches on the roof instead of scraping the roof clean, which will risk damage to your shingles or other roof covering.
Shovel snow from flat roofs throwing the snow over the side away from the building. Most plastic shovels are better, except for the ones with curved blades-those too will do some damage to your roof.
Remove large icicles carefully if they’re hanging over doorways and walkways. Consider knocking down icicles through windows using a broom stick.
Consider hiring professionals to do the job. The combination of heights plus ice makes this one of the more dangerous house chores.
If you don’t hire professionals, at least have someone outside with you in case anything does go wrong.
Keep in mind that any metal tool could conduct electricity if it touches a power line and metal tools may cause damage to the roof.
Here is list of things that homeowners SHOULD NOT do.
Don’t use open-flame devices to remove snow and ice.
Unless approved by a registered professional engineer, don’t add your weight or the weight of equipment to the roof.
Don’t use electric heating devices like hair dryers or heat guns to remove snow and ice.
Don’t use a ladder since ice tends to build up on both the rungs of the ladder and the soles of your boots.
There are several ways to recognize problems with the roof.
Sagging roof
Creaking, cracking or popping sounds
Cracked or split wood members
Bends or ripples in supports
Sheared off screws from steel frames
Sprinkler heads that have dropped down below ceiling tiles
Severe roof leak
Doors or windows that are difficult to open
Bowed utility pipes or conduit attached at ceiling
Cracks in walls or masonry
Here are some other safety tips for homeowners.
Clear snow away from downspouts so water has a place to go.
Never use cooking equipment intended for outside use indoors as a heat source or cooking device.
Do not be tempted to use a heat gun or open flame torch to melt the ice; the risk of starting a fire is huge.
If you feel you are in immediate danger, get outside and call 9-1-1.
Never use your oven for heat.
Space heaters need space, so use them in a 3-foot circle of safety; free of anything that catch fire. Space heaters are not designed to replace your central heating system; they are only designed to provide a little extra heat on a temporary basis. So be sure to turn them off when you leave room or go to bed at night.
Clear snow away from furnace and dryer exhaust vents to prevent carbon monoxide poisoning.
Make sure you smoke alarms and carbon monoxide detectors are working.
Check your outside fuel (furnace) and dryer exhaust vents, making sure that they are not obstructed by snow or ice.
Here are some other safety tips for Business owners.
If you are going to use a snowblower, make sure that it has been approved by a structural engineer to be used on a roof, and that the blower is set to a high level above the roof so as not to damage roof membrane.
Keep gutters, downspouts and drains clean.
Shovel snow from flat roofs throwing the snow over the side away from the building.
Try to shave the snow down to a 2 or 3 inches on the roof instead of scraping the roof clean, which will risk damage to your shingles or other roof covering.
Keep in mind that any metal tool could conduct electricity if it touches a power line.
Use a snow rake for pitched roofs ( available at most hardware stores) to remove snow from your roof.
Remove large icicles carefully if they’re hanging over doorways and walkways.
Always wear protective headgear and goggles when performing any of these tasks.
Most plastic shovels are better, except for the ones with curved blades-those too will do some damage to your roof.
Start from the edge and work your way into the roof.
There are several ways to recognize problems with the roof on Commercial Buildings.
Sagging roof steel – visually deformed
Cracks in welds of steel construction
Water puddles where it never has before
Bowed utility pipes or conduit attached at ceiling
Creaking, cracking or popping sounds
Bends or ripples in metal supports
Severe roof leaks
Sheared off screws from steel frames
Doors that pop open
Doors or windows that are difficult to open
Cracks in walls or masonry
Cracked or split wood members
Sprinkler heads pushed down below ceiling tiles
What to do if you have these problems.
Call your local building or fire department.
If there is imminent danger, evacuate the building and call 911.
What other assistance is available?
Many fire departments have regional technical rescue teams available to local departments in case of collapse.
Massachusetts Task Force 1 is an Urban Search and Rescue Team in Beverly . The team is comprised of Police, Fire, EMS and Civilians who respond to major disasters under a contract with the Federal Emergency Management Agency (FEMA). Currently there are 150 people on the MATF-1 team.


